3 月 11, 2026
Yes. A RIPPA R15 or R18 with a grading blade attachment can achieve professional-quality grading results. These machines combine enough weight to cut and move material with the precision controls needed for fine finish work .
Key facts about grading with RIPPA:
Time required: 2–6 hours for typical driveway or building pad
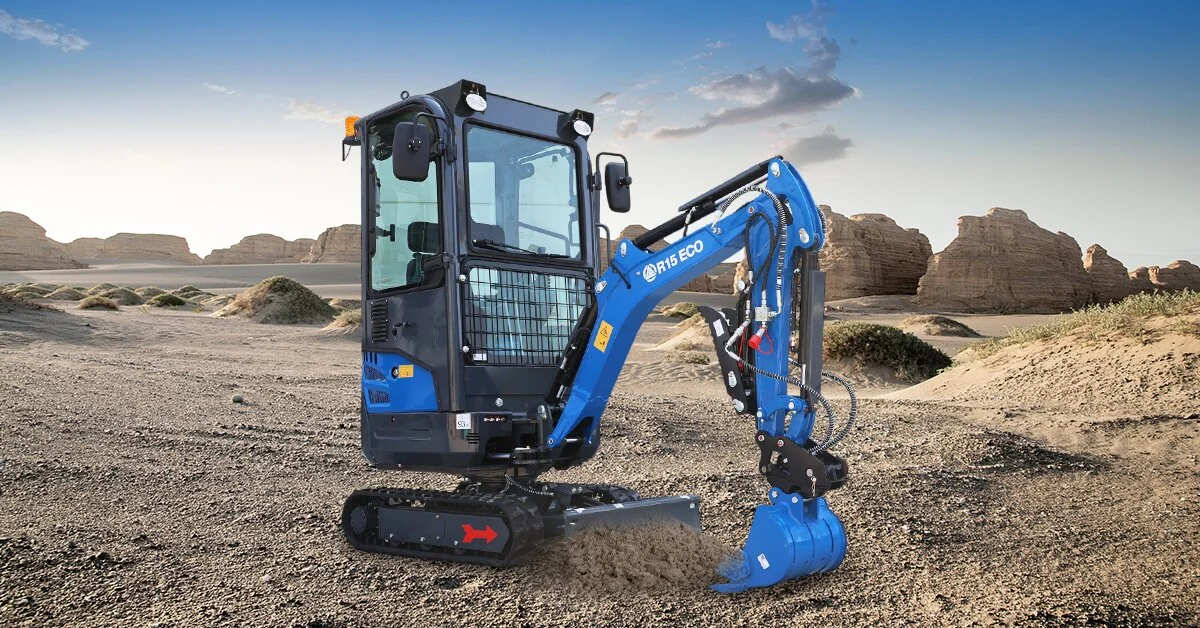
Recommended machine: RIPPA R15 (universal homeowner model) or R18
Required attachment: Grading blade (60–72 inches)
Professional cost avoided: $1,200–$5,000 per project
Precision achievable: ±1/4 inch over 10 feet with practice
Proper grading is essential for nearly every outdoor project:
| Application | Why Grading Matters |
|---|---|
| Driveways | Prevents water pooling, extends surface life |
| Building pads | Ensures level foundation, prevents structural issues |
| Patios/Paver bases | Creates stable base, prevents settling |
| Landscaping | Establishes proper drainage, improves appearance |
| Gardens | Creates optimal growing conditions |
| Drainage | Directs water away from structures |
The cost of poor grading:
| Problem | Consequence | Repair Cost |
|---|---|---|
| Water pooling near foundation | Basement flooding, foundation damage | $5,000–$20,000 |
| Unlevel driveway | Vehicle damage, accelerated wear | $2,000–$5,000 |
| Settling patio | Trip hazard, poor appearance | $1,000–$3,000 |
| Poor lawn drainage | Dead grass, erosion | $500–$2,000 |
| Specification | R15 Value | R18 Value | Benefit for Grading |
|---|---|---|---|
| Operating Weight | 1,500 kg | 1,800 kg | Enough weight to cut, not so heavy to overcompact |
| Digging Force | 10.4 kN | 15.8 kN | Can break up compacted material |
| Load-Sensing Hydraulics | Standard | Standard | Smooth, precise control for fine grading |
| Telescopic Tracks | 980–1,300 mm | 1,100–1,500 mm | Stable platform for consistent grade |
| Pilot-Operated Controls | Standard | Standard | Effortless fine adjustments |
RIPPA engineering advantages for grading:
Load-sensing hydraulic system: Automatically adjusts power based on demand, providing smooth, predictable movements essential for finish grading .
Pilot-operated joysticks: Reduce operator effort by 30%, allowing precise micro-adjustments without fatigue during long grading sessions .
ISO/SAE pattern switch: Choose the control layout that feels natural—essential for beginners learning grading techniques .
Telescopic tracks: Narrow for transport, wide for stability when grading slopes and uneven ground .
| Attachment | Best For | Cost | Essential? |
|---|---|---|---|
| Grading blade (60–72″) | Final grading, crowning | $500–$1,000 | Yes |
| Grading bucket | Light grading, spreading | $800–$1,200 | 可选 |
| Laser level | Precision grade control | $300–$800 | Recommended |
| String line and stakes | Manual grade reference | $20–$50 | Yes |
| Compaction wheel | Compacting after grading | $2,000–$3,500 | 可选 |
The grading blade advantage: A dedicated grading blade offers several benefits over using the bucket:
Wider coverage (fewer passes)
Adjustable angle for material movement
Smooth edge leaves professional finish
Less operator skill required
The goal: Create level, compacted base for structure
Step 1: Site clearing
Remove vegetation and topsoil
Stockpile organic material for later use
Mark building corners with stakes
Step 2: Rough excavation
Cut high spots, fill low spots
Leave 2–4 inches extra for final grading
Establish rough grade with bucket
Step 3: Initial grading
Switch to grading blade
Make passes across entire pad
Check grade frequently with laser
Step 4: Fine grading
Final passes with blade at shallow angle
Achieve target grade ±1/2 inch
Check level in multiple directions
Step 5: Compaction
Compact in 4–6 inch lifts if adding fill
Use compaction wheel or machine tracks
Test compaction with probe or nuclear gauge
Time required: 1–2 days for typical house pad
Blade angle guide:
| Angle | Effect | Best For |
|---|---|---|
| 0° (straight) | Pushes material straight ahead | Spreading, final passes |
| 10–15° | Pushes material to one side | Building crown, moving material |
| 20–30° | Aggressive material movement | Rough grading, ditch cleaning |
| Tilted | Cuts deeper on one side | Creating swales, slope correction |
Pass patterns:
| Pattern | When to Use | How |
|---|---|---|
| Back and forth | General grading | Make passes in opposite directions |
| Overlapping | Finish work | Each pass overlaps previous by 50% |
| Crosshatch | Problem areas | Grade in perpendicular directions |
| Spiral | Large areas | Start at edges, work inward |
Reading the surface:
| What You See | What It Means | What to Do |
|---|---|---|
| Ripples (washboard) | Traveling too fast | Slow down |
| Ridges between passes | Insufficient overlap | Increase overlap to 50% |
| Material building up | Blade angle too steep | Reduce angle |
| Not cutting | Blade too high | Lower slightly |
| Digging in | Blade too low | Raise slightly |
Owner: Mark, Ohio
Driveway: 200-foot gravel, severely rutted
Machine: RIPPA R15 with 60″ grading blade
Time: 6 hours
Professional quote: $2,800
Net savings: $2,800
“I’d been quoted $2,800 and a six-week wait. With my R15, I did it myself in a weekend. The result is better than any contractor ever did—I could control every inch. The crown is perfect, water runs right off.”
Owner: Mike, Pennsylvania
Project: 24×30 foot workshop pad
Machine: RIPPA R18 with grading blade
Time: 2 weekends (excavation + grading)
Professional quote: $8,000 (foundation work only)
Net savings: $8,000
“The concrete contractor told me my pad was within 1/4 inch over the entire 24-foot length. He said that’s better than most professionals achieve. The R18 made it easy.”
Owner: Sarah, California
Project: 500 sq ft patio + terraced garden
Machine: RIPPA R15
Time: 3 weekends
Professional quote: $6,000
Net savings: $6,000
“I wanted a terraced garden and a new patio. With the R15 and grading blade, I shaped the slopes perfectly. The landscape architect who drew the plans was impressed.”
| Project | Professional Cost | DIY Cost (Fuel) | Savings |
|---|---|---|---|
| Driveway grading (200 ft) | $1,200–$3,500 | $20–$30 | $1,180–$3,470 |
| Building pad (house) | $3,000–$8,000 | $50–$100 | $2,950–$7,900 |
| Patio base (500 sq ft) | $1,500–$4,000 | $20–$40 | $1,480–$3,960 |
| Land grading (per acre) | $2,000–$5,000 | $30–$60 | $1,970–$4,940 |
Multiple projects pay for the machine quickly:
| Projects Completed | Professional Cost Avoided | Machine Cost (R15) | Net Position |
|---|---|---|---|
| 1 driveway | $2,500 | $25,000 | -$22,500 |
| Add workshop pad | +$5,000 | -$17,500 | |
| Add patio | +$2,500 | -$15,000 | |
| Add drainage grading | +$3,500 | -$11,500 | |
| Add landscaping | +$4,000 | -$7,500 | |
| After 5 projects | $17,500 | $25,000 | -$7,500 |
After 8–10 projects, the machine pays for itself completely .
| Mistake | Result | Solution |
|---|---|---|
| Traveling too fast | Washboard surface | Slow down to 1–2 mph |
| Insufficient overlap | Ridges between passes | Overlap by 50% |
| Wrong blade angle | Poor material control | Start shallow, adjust gradually |
| Not checking grade | Unlevel result | Check frequently with laser |
| Working wet soil | Compaction, rutting | Wait for soil to dry |
| Skipping compaction | Future settling | Compact in lifts |
| Ignoring drainage | Water problems | Always plan slope first |
The “measure twice, grade once” rule: Check grade every 10–15 feet. It’s much easier to fix a small error than to redo large areas .
9. Grading with Precision: Tools and Techniques
Essential tools:
| Tool | Purpose | Cost |
|---|---|---|
| Laser level | Precise elevation control | $300–$800 |
| Transit level | Manual grade checking | $100–$300 |
| Grade rod | Measure elevations | $50–$100 |
| String line | Visual reference | $10 |
| Tape measure | Distance and depth | $20 |
| Carpenter’s level | Local level check | $30 |
Using a laser level:
Set up laser on tripod in stable location
Establish benchmark elevation
Set laser to desired grade (or use manual)
Check grade rod at multiple points
Adjust blade until rod reads target
The 1% rule: For drainage, aim for 1% slope (1 foot drop per 100 feet). This is enough for water flow but not noticeable to the eye .
A: Yes, but it’s harder and takes longer. A grading blade gives better results with less skill required. Owners report that a blade pays for itself in time saved within 2–3 grading projects .
A: Start at the center line. Angle blade to push material to the right. Make pass from center to right edge. Then angle blade opposite direction and push from center to left edge. The center will remain higher.
A: 5–10° is ideal for finish passes. This moves small amounts of material while leaving a smooth surface. Straight blade (0°) works but may leave marks.
A: Use a straightedge (10-foot 2×4) across the surface. You should see even contact. For drainage, pour water—it should flow, not pool.
A: Avoid it. Wet soil clumps, sticks to blade, and compacts poorly. Wait for soil to dry to “workable moisture” (forms a ball but crumbles easily).
A: With practice, 10–20 cubic yards per hour is typical. The R15’s bucket holds about 0.1 cubic yards, so it’s about moving 100–200 bucket loads per hour at speed.
A: For driveways and building pads, yes. For landscaping, maybe not. Compaction prevents future settling. Use machine tracks or rent a compactor for best results.
A: Grade across slopes, not up and down, for safety. The R15 handles up to 30% grade (16.7°), but always prioritize stability.
Grading and leveling land with a RIPPA mini excavator transforms rough, uneven property into usable, attractive space. The R15 and R18, with their precision hydraulics and grading blade attachments, deliver professional-quality results that save thousands in contractor fees.
Whether you’re fixing a rutted driveway, preparing a building pad, or shaping a landscape, the techniques in this guide will help you achieve the grade you need. With practice, you’ll develop the eye and feel for material movement that separates amateur results from professional finishes.
The satisfaction of looking at a perfectly graded driveway or level building pad—and knowing you did it yourself—is unmatched. Your RIPPA becomes not just a machine, but a tool for transforming your property exactly as you envision.
Ready to start grading? Visit the RIPPA website to explore the R15 and R18 models, and find a dealer near you. Ask about grading blade packages and watch the tutorial videos to build your skills before your first project.


 首页
首页
 产品
产品
 电子邮件
电子邮件
 WhatsApp